Finally, a Car

My parents finally got a car, as I alluded to in the last post. To make a long, rambling story a bit shorter, a month or so ago my dad mentioned he found some extra money and he was interested in a larger down payment on whatever car he decided to buy. For a little while, we were thinking of leasing, but I think it starts to make less sense as your down payment increases. Plus shopping for a lease is a lot harder than shopping for what is essentially a cash deal. So I took another look at cars that might fit our criteria and I stumbled on the Mazda 6.

I, like a lot of people evidently, kind of forgot the 6 existed. Mazda has sold about 30,000 a year for the last five years or so. During the same time, they sold about five times as many CX-5s. Mazda considers the 6 their flagship though, and it shows. A few weeks ago my mom and I went to a local Mazda dealer to drive a new 2021 Mazda 6 Carbon Edition.

Mazda 6 Carbon Edition

The Carbon Edition includes the same equipment as the Grand Touring Reserve trim, but adds exclusive colors for the body, wheels, and interior. The GTR trim is ridiculously well equipped; it’s probably easier to link to the brochure than list everything here. The exterior is very attractive, and the interior is even better.

Mazda 6 Carbon Edition interior

We drove it and really liked it. The engine is a turbocharged 2.5-liter four cylinder, and while it isn’t super fast, it’s quick and very responsive. The transmission is probably the best automatic I’ve ever driven. It keeps the lock-up clutch engaged almost all the time, it doesn’t hunt for gears, it doesn’t downshift unless you prod the accelerator, but when you do it downshifts directly, with no hesitation. The new one we drove stickered at around $32,000, which was a bit much, but I think a good value if you have to have a new car. The one word I would use to describe this car is “refined.” Totally unlike older Mazdas. I set out looking for a used one within a reasonable distance from home.

I found a few from dealers in northern New Jersey and one from a dealer in Maine. We eventually got the one in Maine because it was the best overall combination of price and miles it seemed, plus it was white. And a really nice metallic white at that, called Snowflake White Pearl Mica. The interior was black, which is a good-enough color, but way better than the white that was also offered.

We got a 2018, but this 2021 model looks identical

I drove it home from Maine, a trip of about four and a half hours. It’s a great car to drive. Very comfortable, plenty of passing power, adaptive cruise control, a heads up display, and auto-dimming mirrors; it makes for a great highway car. At the same time, the tight and eager steering and suspension make it fun to drive on curvy roads, too. I really can’t say enough good things about it. A few items aren’t my favorite, but they’re the typical Japanese car things and aren’t really worth talking about.

It’s finally done, for now at least, and my mom is very happy with the new car (especially the heated steering wheel). I think this car will end up being a good choice, with a great combinati0n of style, speed, comfort and reliability that probably couldn’t be matched with the Genesis and Lincoln models we were previously interested in.

What I’ve Been Doing

Last I left off, I was going to put an extra manifold gasket on my Triumph. I did that, and it definitely fixed the sucking noise issue, but I still didn’t have any luck with the idle problem. More expensive and pressing car problems came up, so that’s where things are still sitting. I haven’t driven the car in a few weeks. Before the summer is over, I’m going to get new diaphragms for the bypass valves and a new ground wire for the distributor. I have a friend with a shop that will soon be able to do state inspections, so I’ll have him inspect it when he’s able, and maybe I’ll borrow his compression tester while I’m there to see how the engine is doing inside. But after that, I’m done spending money on the car for the season. I have other things that need my money and time, and an annoying car can be put on the back burner.

In tech news, my Ceton TV tuner died about a month ago. Just overnight, poof, it didn’t work. There was no obvious damage to the hardware or software, and I spent two hours with Verizon support diagnosing the problem. I initially ordered another used Ceton tuner from eBay, then decided to return it and get a new HDHomerun Prime for about the same price. The HDHomerun is a sort of re-run of a tuner that originally came out like 10 years ago, so it only has three tuners to the Ceton’s six, which is a disappointment. On the bright side, it actually works, has a warranty, and the company still exists. Plus, it works with whatever software, so I don’t need to run a whole Windows VM just for CetonProxy anymore. Which brings me to my next item:

I finally plugged my server into a Kill-a-Watt, and (probably unsurprisingly) it uses a ton of power at idle, which is most of the time. Right now it only runs a couple of fairly light VMs, so processor utilization is almost always in the low single digits, but it uses 200 watts of power. I explored a few options to get rid of the whole server, including hosting Jellyfin on a Raspberry Pi, but it’s just impossible to beat the cost per terabyte on the big server. My six 3TB hard drives in a ZFS array give me 12TB of usable storage, and a failure tolerance of up to three disks (or two, I can’t remember now). Anyways, even getting just 6TB of total storage (two 6TB drives with RAID 1) would cost about $300 for new ones, and I’m still left with only half the storage space that I have now. And while that Raspberry Pi runs Jellyfin very nicely (thanks to the hardware accelerated video playback), NextPVR can’t take advantage of that same acceleration, so web browser viewing of live TV is impossible. So I’d have to purchase new hardware. Prices for crap office desktops are seemingly up from last year, which bites. Factoring in selling the server components, I’d probably come out about even switching to lower power consumer hardware. So rather than do all that stuff, I bought some different processors, a pair of Xeon E5-2450Ls, the 65 watt version of my current 95 watt 2450s. This should give some decent power savings I think, plus I’m going to take out the graphics card that I never could get working for transcoding. The processors should be in by early next week, so I’ll make an update when I get them installed.

More on the Triumph

Since my last update, I got the Triumph registered and on the road. After the first test drive I knew I had some more work to do. While the car would idle like a champ, when the engine was subjected to even a mild load, it would ping (detonation or pre-ignition) like crazy. I tried enriching the fuel mixture and retarding the timing, but I wasn’t getting anywhere. I realized my timing reading of 20°-28° BTDC was probably correct. I retarded the timing as far as I could, but the engine would stall out, even with the timing set nearer to 20°. I decided to try replacing my Pertronix electronic ignition with the old points and condenser. To my surprise, this actually made a small but noticeable difference. The engine started much easier and the pinging was slightly better. Not good enough to be usable, but better. I replaced the old points and condenser with new parts for good measure, but that didn’t magically solve my problem.

It was looking like I’d have to dive into the valve timing. Several years ago, I replaced the original camshaft with an aftermarket performance cam that came with the car. I didn’t fully understand the procedure for synchronizing the cam and crankshaft in the workshop manual, so I made my own timing marks on the sprockets and lined it up as best I could. This turned out to be a mistake. With a newfound comprehension of the “on the rock” method of setting up cam/crank timing, I discovered I set up the camshaft about 20° ahead of where it should have been. I’d been dreading this, even though from the start I knew it was almost inevitable. Adjusting cam timing on this car is a big job, and I was really hoping to avoid it.

I decided to get started in the evening, and I was able to get everything apart, set the correct timing and then start with the reassembly before dark. I finished up by about noon the next day. This test drive was much, much better. I was still getting some pinging, but it was vastly improved. The timing light showed a much more sane 8°-10° BTDC, which is an oft-recommended setting on the forums. However, I couldn’t really get the car to idle, plus there was still the pining I mentioned. The valve cover gasket was wrecked, so I decided to put the car away and do some research.

After a little reading, today I decided to remove the bypass valves and temperature compensators from the carbs and cap their holes to see if they were at fault. I think it may have made a small improvement, but the car still wouldn’t idle nicely. I was able to get the idle down for long enough to hear a loud sucking noise though. I discovered the manifold (the intake and exhaust manifolds share a gasket on this car) gasket was leaking. I never noticed the sucking noise before, and previous attempts at spraying the area with carb cleaner and starting fluid revealed nothing either. Luckily, I have an extra gasket that’s been hanging around for a while. I’m going to try to get it installed tomorrow, and I think I’ll double up my gaskets. Some people on the forums recommend that. I figure it can’t hurt. I’m hoping fixing this gasket issue should finally get the car into a driveable state.

Finally an Update on the Triumph

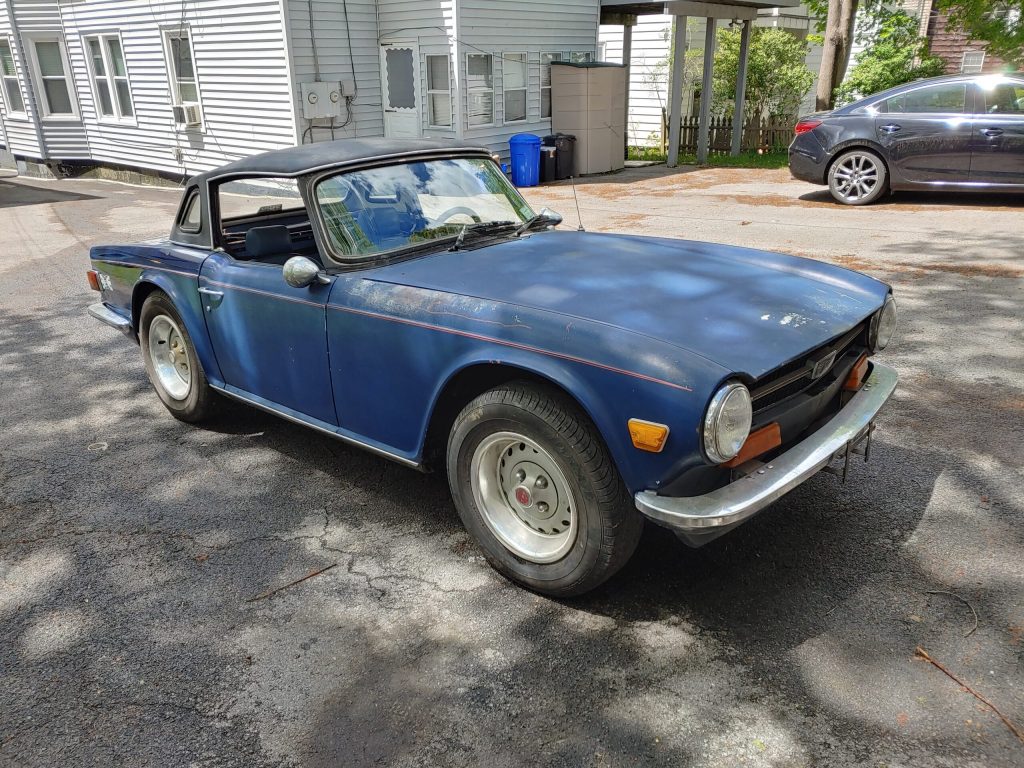
I promised to post an update on my Triumph (named Nigel) just about a month ago. I’ve made some great progress, and this time I remembered to take some pictures.

In the last update, I managed to get the car running, but only with the choke on. This seemed to point towards a vacuum leak, but I couldn’t find a strong one. Using the ol’ spray some carb cleaner all over the place method, I learned the spacers between the carburetors and intake manifold weren’t making an airtight seal. I ordered new spacers and gaskets, and that actually made a big difference. Along the way I also removed the EGR system, disconnected the vacuum retard on the distributor and the bypass valves on the carburetors. I may reinstate the bypass valves after some driving.

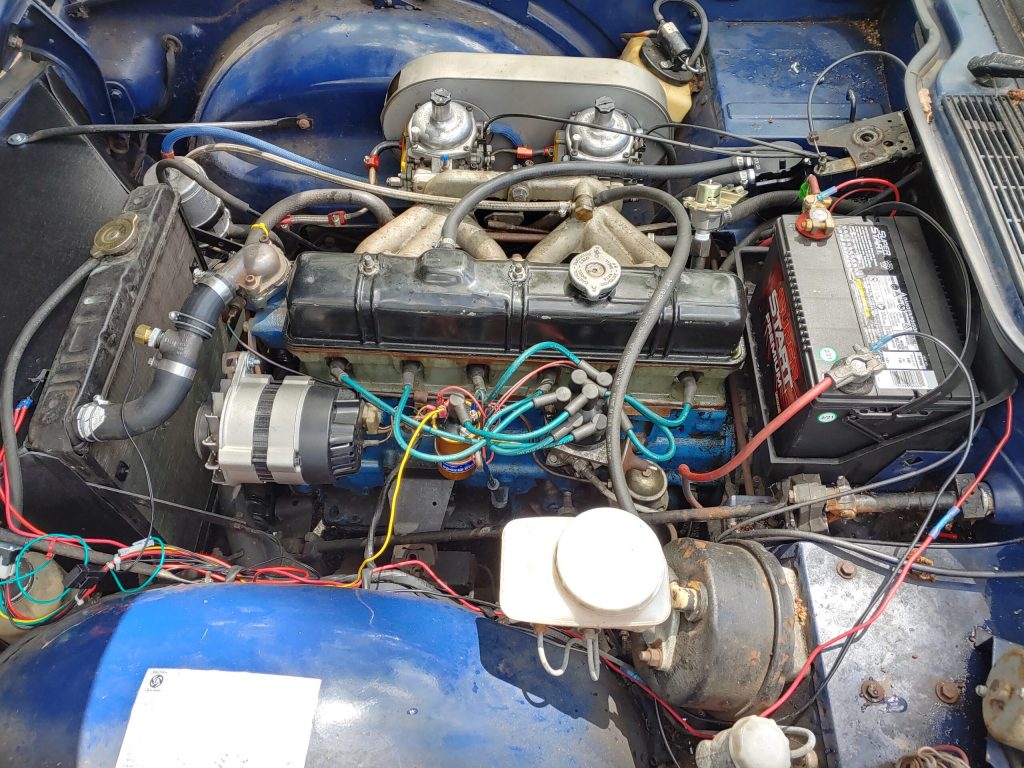
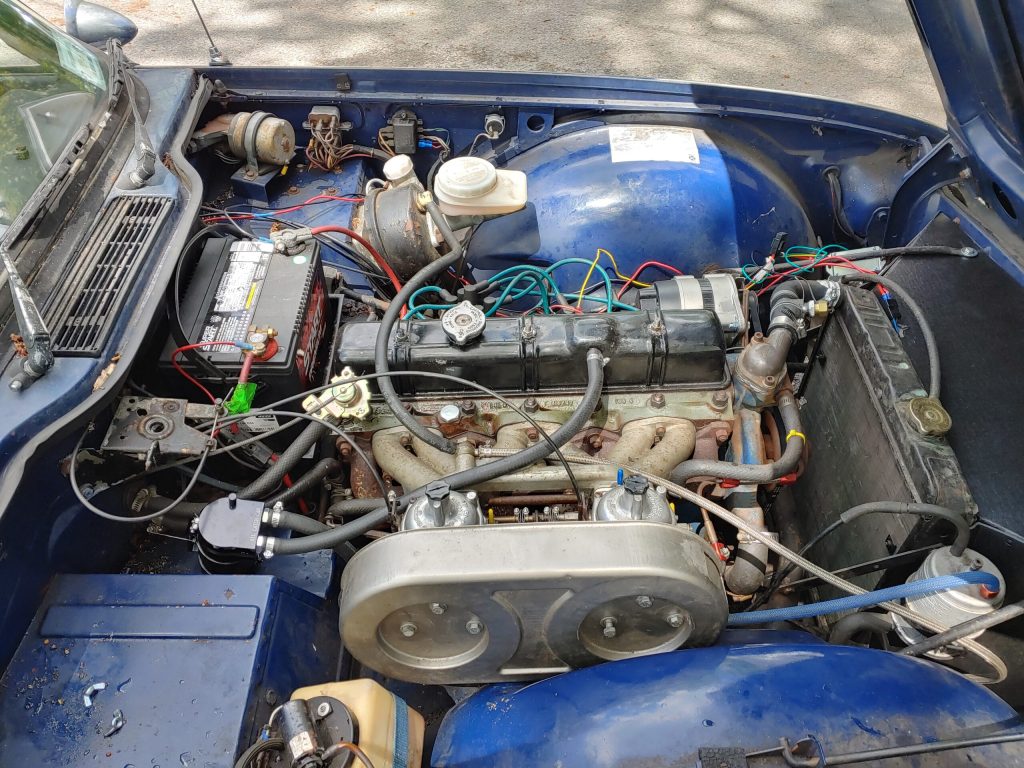
If you know what to look for, you’ll notice the absence of an EGR system and the addition of an oil catch can. The heater valve is new, replacing an old leaky one. The stock air filters are on, but I’d like to replace them with something aftermarket. I know this car came with some oval shaped foam ones, but I have to find them, if I didn’t throw them away.

At the same time, I discovered the vent port on the rocker cover was spewing smoke into the carburetors, upsetting the airflow and causing difficulty with keeping the engine running. I rerouted the engine fumes into an oil catch can, but I may try to put this system back to stock in the future. The catch can doesn’t catch everything, and smoke still comes out of it. I think this is probably a sign that the piston rings could use replacement, but we’ll see how it goes. I’d like to kick that can as far down the road as I can. I’ve read that filling the engine oil to the top mark on the dipstick may in fact overfill the engine, so I’m going to try putting somewhat less oil in when I change it.

I also advanced the ignition timing quite a bit, enough to be off the scale on the crank pulley, and that made the biggest difference in the engine’s ability to run normally. Whether the timing is actually about 26° BTDC, I don’t know. The crank pulley may not be correct anymore. I’m hoping the timing works on the road, because the engine has never run this well or been this easy to start before. Reports on the TR6 forums suggest that this timing will probably be fine, but it varies car to car.

Moving to the other side of the engine, you can see the new wiring for the electric fan.

The wires could use a little organization, but they get the job done. The rocker cover leaks of course, but I’m going to leave it and see how bad it is. I may add a bead of RTV silicone under the gasket if it’s too leaky.

The bundle of wires below the radiator are for the fan controller, which works wonderfully. Part (or maybe all) of the reason it wasn’t working was because I had it wired wrong. I may not have needed the new temperature sensor, but it’s a lot more elegant than shoving a probe into the radiator fins. The only problem with it is the fan uses a lot of electrical power. With the engine idling, there’s barely enough power to run the ignition system and the fan, so the engine comes close to stalling. I just had the original alternator (a 40 amp unit I think) rebuilt, so I don’t want to replace it now, but I might next season. There are plenty of higher output options for the TR6.

Today I decided I’d see if a polish and wax would wake up the paint at all. I had mixed results, but no parts are worse than before.

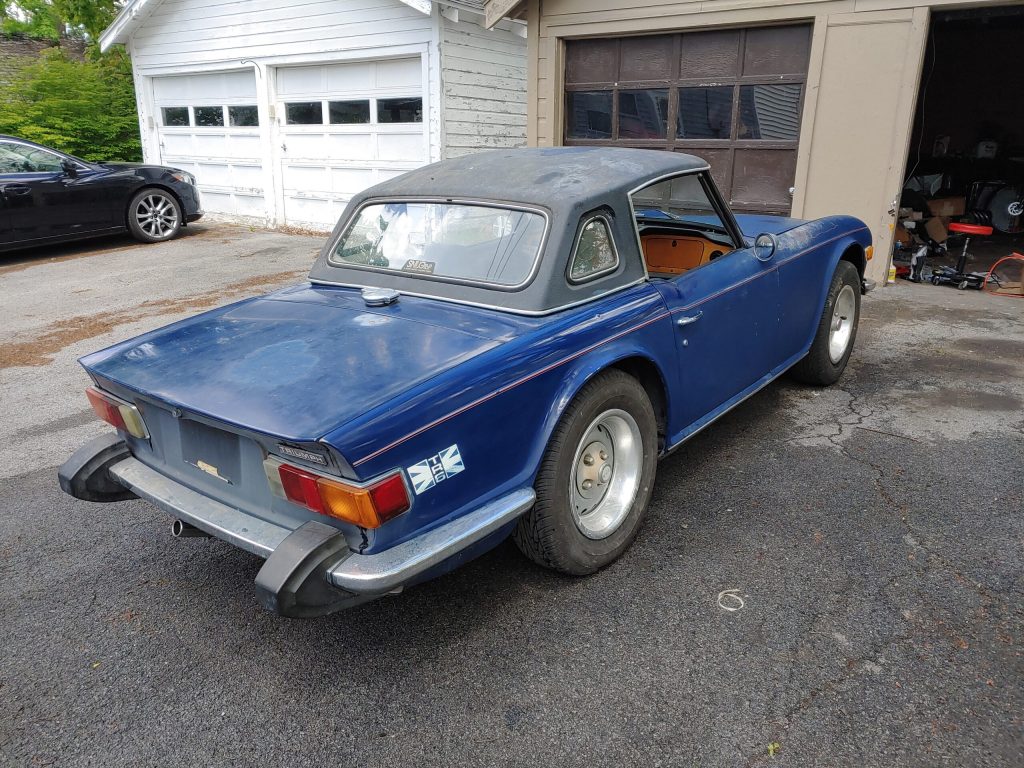
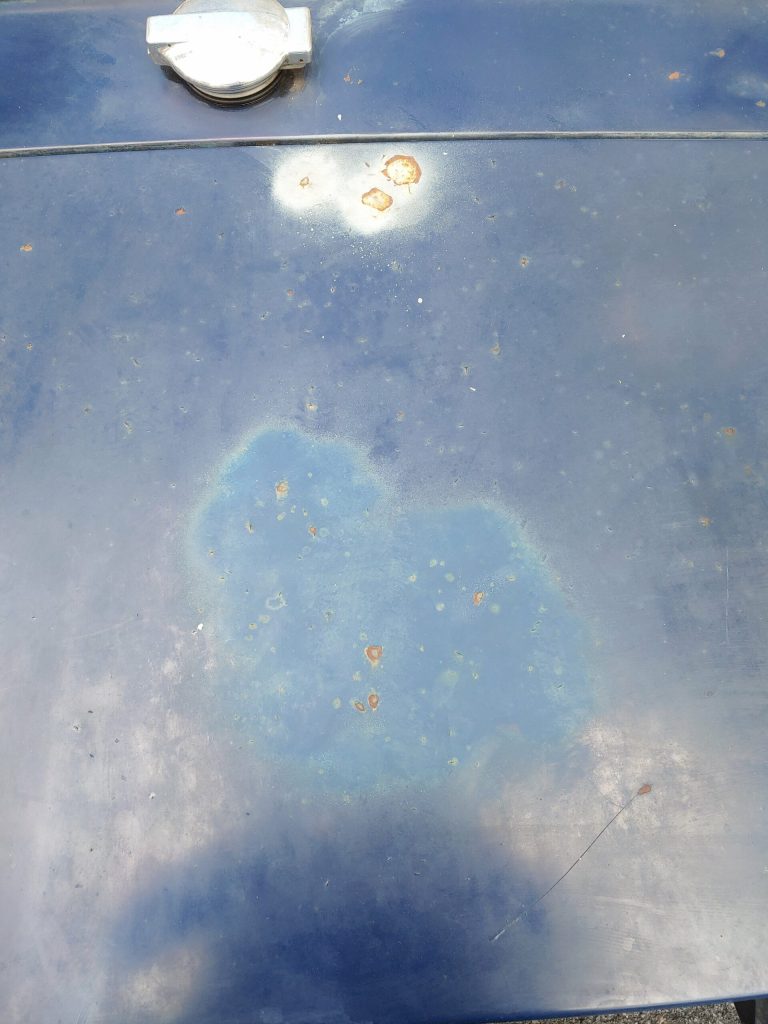
The right front portion and the hood is slightly better, but not great. The right rear is actually not terrible. The trunk has a couple spots I need to grind down and hit with primer soon.

The vertical surfaces of the left side however, came back pretty nicely.

Just like the engine could probably use a rebuild, the body needs a repaint. A good paint job will be out of my budget for the foreseeable future though. Plus I don’t know what color I’d paint it.

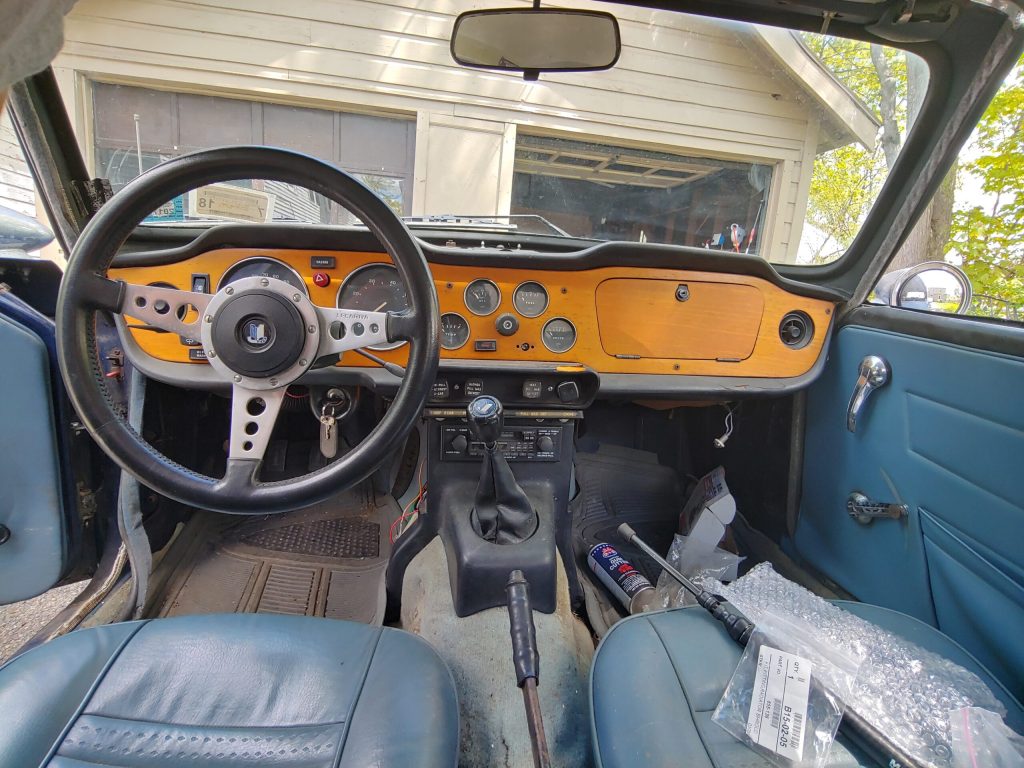
The interior isn’t in amazing shape either, but it stays put together. I need to get carpet some day and replace the trim near the center control knobs.

The car just needs a tail light socket and it’ll be ready for inspection. That and an a few other parts should be in tomorrow. I have new engine mounts already that need to be installed in the next couple weeks. My latest order includes new front shocks and wheel bearings, plus parts to help replace the half shaft universal joints. I’ve had the joints themselves for a while now. I need to replace the rear shocks and springs too (especially with the new exhaust, the mufflers hang really low), but they’ll have to wait a little while.

I Got the Triumph Running

It’s time for an update, and it’s a good one. After a surprisingly short amount of work, I got the Triumph running, and running somewhat better than I expected. I regret not taking any pictures during the process, but it wasn’t really that exciting. I have a few things to address before the car is road-ready, but they shouldn’t present much trouble.

The first thing I did was remove the alternator and take it to a local place for a rebuild. Last time I was working on the car, I hooked up a jump pack backwards and smoke came out of the alternator. After taking it off and spinning it, I found the bearings a little stiff, so it was probably time for a refreshing anyways.

Next, I replaced the head gasket. I figured the gasket needed replacing due to a compression test from the last time I worked on the car. All the cylinders had compression, but it was low and very inconsistent. I expected to need most of the day to prep the head for removal; in fact, it took barely over an hour. I was ready to remove the head at around 11:30am, but no one was around to help me (with both manifolds attached it probably weighs 70-100 pounds). So I decided to work on something else I’ve been meaning to get to.

I’ve wanted to remove the engine-powered cooling fan and replace it with an electric fan for quite a while. I’ve had a fan and a controller kit, plus an engine fan eliminator kit ready to go for a few years. While waiting for my wife to get home to help with the head, I went ahead with the electric fan installation. The fan I bought was too thick to use as a puller behind the radiator, but luckily it was reversible, and thus easily mountable on the front of the radiator. I used the supplied zip ties to mount the fan to the radiator, and then connected the controller. After getting the car running, I discovered two problems with the controller: one, connecting it to the ignition coil doesn’t provide enough power, so I’ll probably connect it straight to the battery; two, the included push-in probe that sticks in the radiator fins sucks and doesn’t with with my radiator. I ordered a screw in replacement that I’ll put in a metal tee in the upper radiator hose.

I still had some time leftover, so I gave the carburetors a quick clean up and refresh and bought some supplies like coolant and a battery.

Once my wife got home, we took the head off, and to my surprise the gasket appeared to be in fine shape. I was expecting a missing chunk or something like last time. The block appeared in good shape also, and so did the head and all the valves. I don’t have a straight edge, so I didn’t check flatness, but I don’t think it’s an issue; I’ve never had coolant and oil mixing. I put the new gasket on and we set the head down on it. The next day I took maybe two hours or so to button it up.

Once everything was bolted together and filled up and plugged in, it was time to fire up the car. It took maybe half an hour of trying to get the car started, and when it did finally get going, it would only stay running with my foot holding the throttle open slightly. Yesterday, I mostly fixed the hard starting problem by adjusting the choke, which wasn’t doing anything at all. Now the car will run unattended, but only with the choke on. That seems to point to some kind of vacuum leak. I tried to track one down last time, but to no avail. Currently, my top potential culprits are the EGR valve, which I plan on eliminating, or the rocker cover, which is kind of out of shape. I plan to address that with a bit of RTV silicone. Hopefully that will take care of things and I can get the car registered and on the road in a week or two. I’ll be sure to add some pictures to the next post.

Getting the Triumph Back on the Road

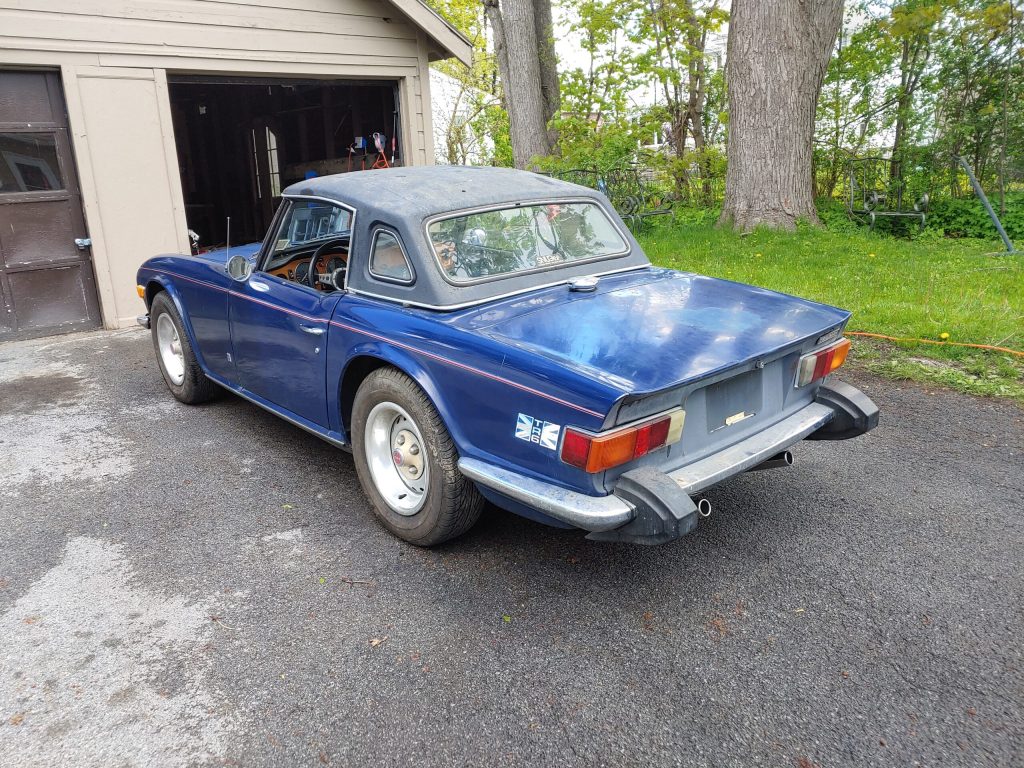
After five years of sitting, I’ve decided it’s finally time to get my 1974 Triumph TR6 running and back on the road. In 2016 (I think), I had it running after repairing a damaged head gasket. That fix only lasted a handful of miles. I did a compression test at the time, and determined another failed head gasket is likely the problem. I think they keep blowing because the engine overheats. The radiator is full and the water pump is good, so I think the ignition timing is the culprit. To cover all the bases, I have a 160° thermostat to put in to keep things cooler.

It took so long because I haven’t had the right combination of money and time until now. About a year ago, with pandemic benefits coming in, I bought almost everything I needed to get the car going. I couldn’t get rocker shaft studs though, so the project was put on hold again. I rounded up the remaining parts today and ordered them. Hopefully they’ll be in by next week. In the meantime, I need to get the alternator rebuilt, which a local company can probably handle. I’ll be dropping it off tomorrow.

Once the parts are in, the whole thing should probably only take a few hours, potentially spread over two or three days. I have a vacuum gauge to accurately set the ignition timing now, so hopefully I can avoid overheating this time.

I Made My Car Feel 10 Years Newer with One Simple Trick

I just couldn’t resist the obvious clickbait title. As you know, about two weeks ago, I got my car back into good shape and extinguished a few warning lights that had been illuminated all summer. This week, I decided to finally get to the bottom of a problem that had vexed me since I first got the car two years ago.

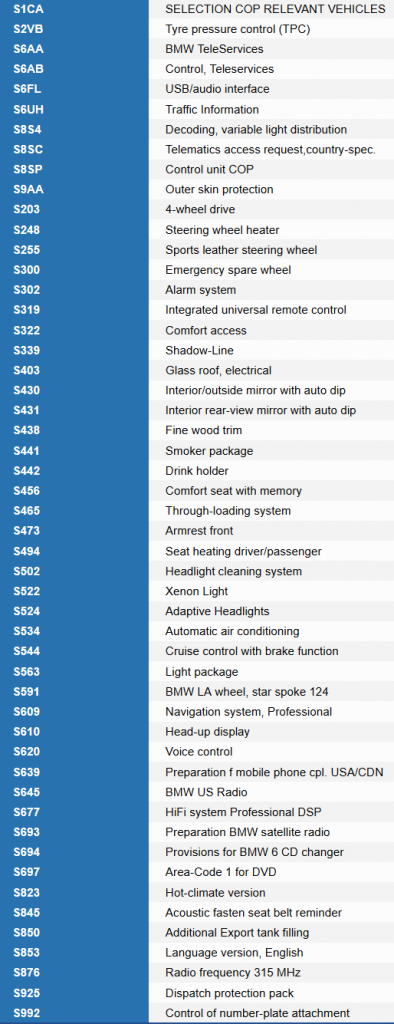
Here’s the build sheet for my car:

This lists the equipment the car rolled out of the factory with. I retrofitted the satellite radio shortly after getting the car, which doesn’t show up here. Of interest to me is the line labeled S322, comfort access. With this option (which I think was actually standard equipment for 2008+ cars), you leave the car key in your pocket and unlock it by grabbing the door handle. To lock, you touch the area near the keyhole. To start the car, you just depress the clutch and hit the start button like every modern car. This was pretty high tech for 2008, let alone 2004 when the car launched with comfort access as an option. The comfort access never worked on my car for some reason, so like a Neanderthal, I had to press the buttons on the remote to lock and unlock, and slide the remote into its slot to start the car. My friend with more BMW experience than me had me convinced that my car didn’t actually have comfort access.

On a whim, I decided to explore the issue in more detail earlier this week. I was able to determine that my car definitely has comfort access thanks to a forum post that shows the differences between cars with and without the system. The only real external difference is the key. On cars with comfort access, the key has an extra door on the back for a battery. My key has that, and in the past I’ve actually changed the battery. Now that I knew I had comfort access, I had to get it working.

Other forum posts described a series of voodoo button presses that didn’t work for me. One poster mentioned that while the E60 5 series can have up to 10 keys programmed to it, only two of them can be used for comfort access. I only have one key, but that didn’t mean more weren’t programmed to the car. I fired up my laptop with ISTA on it and read out the key information. It reported that 10 keys were programmed to the car. I deactivated every key except mine, and that did the trick.

I now have comfort access working on my car after somehow getting by without it for two years. It honestly feels like my car is 10 years newer. I’ve been looking for excuses to drive it around so I can feel more modern.

Finally Got My Car Fixed

Earlier this summer, and in fact starting in the late spring, a bunch of warning lights popped up on my car out of nowhere. A quick scan with my bootleg copy of Rheingold ISTA showed me there was poor/erroneous signal coming from the right rear wheel speed sensor. I couldn’t clear the code, which led me to believe there was probably an open circuit somewhere, even though no trouble codes from the car explicitly said that.

I started by swapping the rear wheel speed sensors from left to right and vice versa, hoping that the problem would be a cheap and easy to fix sensor. Unfortunately, that was not the case. I wanted to check the tone ring for the sensor next, despite it being unlikely that a damaged tone ring would cause an unclearable code.

On this car, a 2008 BMW 535xi, the tone ring is built into the wheel bearing, and you can’t see it without taking the axle out of the bearing. I knew it would be some work to get everything apart enough to look at the tone ring, so I figured for $50 or so, I might as well replace the bearing while I was there. I watched a couple videos on removing the bearing from the car, but I think all of the featured cars were automatics, and mine is manual (fairly rare in an E60). You would think that wouldn’t have anything to do with the rear axle and wheel bearing. You’d be wrong. On the manual cars, the axle is an extremely tight fit into the hub of the bearing. Every other car I’ve worked on, the fit has been tight, but loose enough to push the axle in and out by hand if it’s new and lubed up. On the manual E60s, it’s so tight I had to buy a puller to rip the bearing out of the spindle. There’s probably a special tool to install the axle, but I don’t have one, so I slammed it into the concrete floor of my driveway a few times. This whole thing turned into a multi-week saga because of the weather, waiting for parts multiple times and my constantly fluctuating levels of motivation. My car was on jack stands in the driveway for about three weeks. And at the end of it, I didn’t fix anything. The lights were still on. If I knew how huge a pain this job would be I wouldn’t have done it. On the other hand, now that I’ve done it once, I could do it much quicker in the future.

Next, I decided I wasn’t interested in fixing the car myself. I tried a used ABS module because it was cheap and quick. This didn’t fix anything either. I knew there was likely an open circuit between the right rear wheel speed sensor and the ABS module, but I thought that I didn’t have the right tool to probe the tiny pins on the electrical connectors, and I didn’t want to run new wires down the length of the car. The shop I took the car to seemed more interested in fixing minor or nonexistent problems than diagnosing and repairing the ABS problem. So that was $100 and change down the drain.

I finally got around to diagnosing the problem myself with some help from some male to male jumper wires for hobby electronics. It turned out they’re just the right size to fit into the tiny pins on the electrical connectors. I quickly discovered an open circuit on one of the wires going from the sensor to the ABS module. Yesterday, I finally got around to replacing the wire, and it fixed my problem. At first, on the ABS light was extinguished, but after quickly calibrating the yaw rate sensor, they all disappeared. I took the car for a test drive, and everything seems normal now. The next step is to get a fresh inspection sticker for the car, and then hopefully I’m done with fixing it for a while. I do want to do an all wheel drive service, which I have the fluids for, but I really need a lift for it. I’ll have to see if my friend with the shop could lend me some lift time for it.

Diagnosing my ABS problem

I finally got around to taking the wheel off my car to see where its ABS problem is, and I tracked it down in a couple minutes. There’s an open circuit between one of the ABS sensor wires and the ABS module. What a surprise. I took the car to a mechanic thinking this would be an very easy thing for them to take care of. I assumed there was probably an open circuit somewhere in the system and figured the mechanic could diagnose the problem and put in a new wire, but they were more interested in upselling me. So I’ll probably work on it some more tomorrow. I’m going to have to take out the passenger seat and some trim to run a wire from the back of the car to the front, which I’m not thrilled about. Hopefully this fixes everything. There’s also a problem with the steering angle sensor, which I’m really hoping can be with a good cleaning. I’ll get to that after the ABS problem is solved.

My car is back from the mechanic no different than when it got there. I was hoping they’d be able to diagnose the wonky right rear wheel speed sensor, but they didn’t seem all that interested. All it needs is to have the continuity and resistance tested on the wires from the sensor the the plug on the ABS module. Apparently their electrical whiz was out sick. I think it’s kind of hard to be a professional mechanic and not be comfortable doing such a simple electrical test. They also tried to get me to spend thousands of dollars on work the car doesn’t need. I was told the front and rear struts needed replacement and the tires were chopped. The rear struts might actually need to be changed, but I put the fronts on a year and a half ago, and the tires aren’t new, but they’re in fine shape. I was really disappointed in this place. Two former coworkers who I look up to worked there, and they’re both excellent mechanics, so I was expecting something better than the stereotypical upselling mechanic. On the upside, the manager of the place jogged my memory and gave me a place to start looking. Last summer, one of the sunroof drains got clogged and water pooled up in the right rear foot well. I suppose it’s possible it’s taken a year to do the damage. He also seemed confident it needs a new steering angle sensor, which I’m not totally sure about. I’m going to see if I can get the ABS thing fixed first and then see about the SAS because that wasn’t a problem until I decided to try recalibrating it.

I’ll have to figure out a way to diagnose the ABS problem myself, which I would have done earlier if I had the tools. Many of the electrical pins on connectors in cars are really, really tiny and need special adapters to be tested with a multimeter. Those adapters are really, really expensive. I’m thinking about ways to make some myself. It’s going to be pretty nice outside for the rest of the week, so I’ll see what I can get done.

In an unrelated matter, I polished and waxed my mom’s convertible and my wife’s car. It’s easy, but time consuming; I think each of the three cars I’ve done has taken about three and a half hours. The results are worth it though. The car comes out so shiny and smooth. I think the convertible came out with the most impressive results, probably because it’s black, which shows everything in the paint, good and bad.