The Dust Settles

After too many weeks of struggling and waiting and struggling some more, I finally have a functional server running almost all the services I was planning on, including this blog. Last we left off, about a month ago, I was rounding up the parts I needed to assemble a white label server. So here’s what I got.

The Hardware

Intel S2400SC motherboard: This is a dual socket LGA1356 motherboard with eight RAM slots total and a decent selection of PCI express slots. I picked it because it has PCIe x16 and x8 slots that would be capable of holding a graphics card. I initially planned to use the built-in SAS mini ports to handle my hard drives, but this didn’t end up working out. I used the same Xeon E5-2450 CPUs I bought for the HP server. I also decided to add 16GB more memory just in case.

Dell PERC H310: I flashed this popular and cheap SAS card to IT mode which allows it to be used as an HBA so I can use ZFS instead of hardware RAID.

Corsair RM850x power supply: I spent a tad more than I wanted to really, but I wanted an 80 Plus Gold power supply giving at least 850 watts with semi-modular cables at the minimum. They were all priced similarly, but in and out of stock, probably due to the pandemic.

HP NC365T: A popular and cheap 4-port gigabit network card.

Antec P101 case: I picked this because it billed itself as a quiet case, it came with four fans and it said it should hold an E-ATX motherboard, meaning my CEB motherboard shouldn’t be a problem.

Turned out, the CEB motherboard was a tiny problem. Despite what the internet said would happen, only three screw holes lined up with the standoffs in the case. The standoffs that didn’t line up were touching the motherboard, so they had to be removed. The motherboard was definitely not mounted securely with only three screws, and it was a bit too flexible with no standoffs behind it. There were some foam standoffs on the motherboard, but only two and they weren’t in the right places.

I moved and super glued the foam standoffs into new positions, and then I 3D printed a few more for the rest of the board.
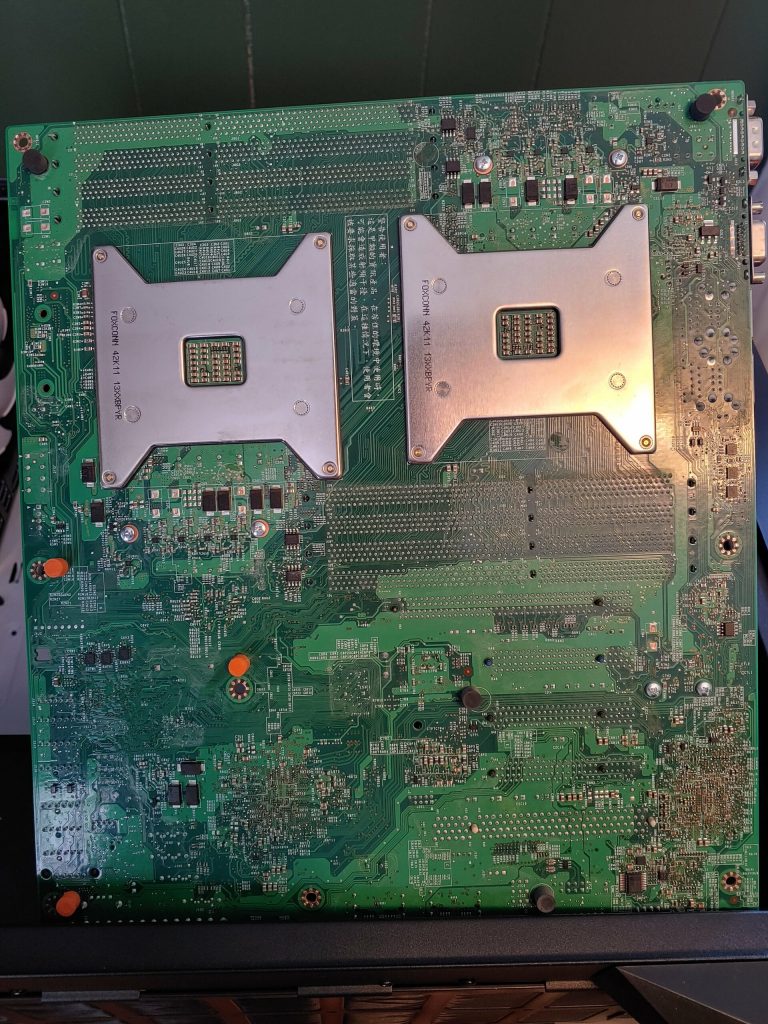
The orange things are the 3D printed standoffs.

With that done, it was no trouble the get the board in and screwed down. I had to use a zip tie in the upper right corner, but it gets the job done just fine. Building in this case was alright I guess. I’m not a fan of the immovable power supply shroud, and I don’t really care for the tool-less drive bays. On the other hand, there wasn’t much choice for an E-ATX case at this price.
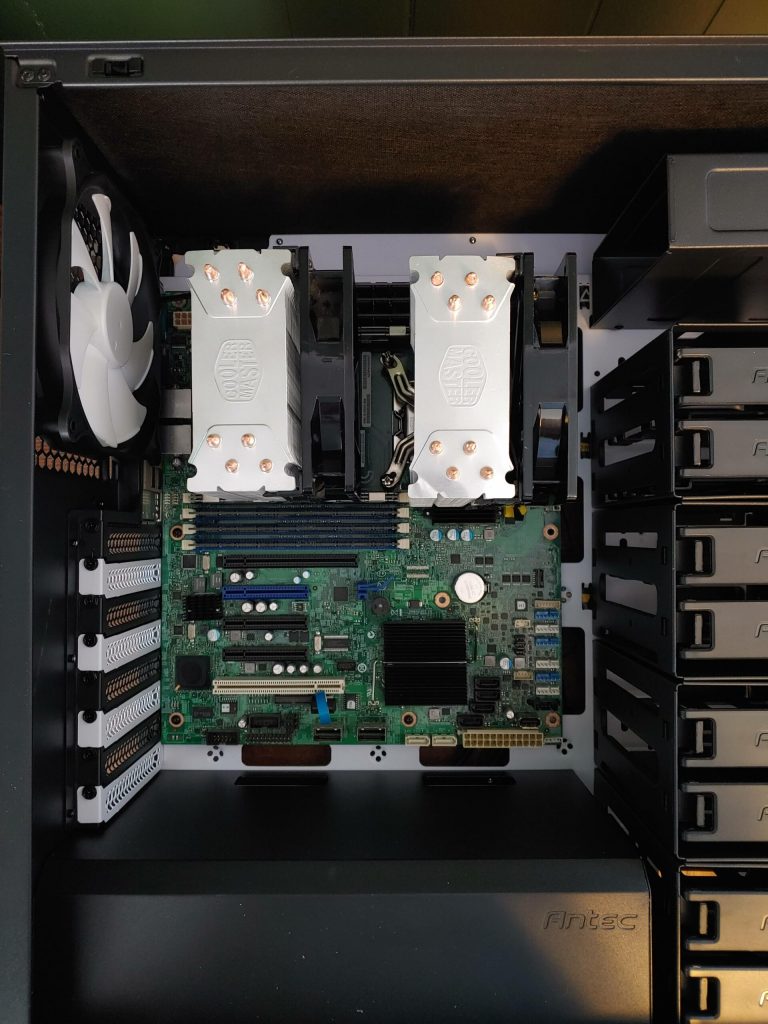
Mmmmmm, that dual-socket goodness.

With the basic components assembled, it was time to install the hard drives and get going. Flashing the H310 to IT mode was a piece of cake and not worth talking about more. I bought two Seagate 1TB SAS drives to use in RAIDZ for my hypervisor. For some reason, these are incompatible with the H310. It knows the drives are connected, but doesn’t pass them though to the OS. I couldn’t get to them in Proxmox or a GParted live USB drive. It might be the fault of the hard drives, and not the H310, but I don’t have any other SAS equipped devices to test that theory out. So I bought another copy of an old 750GB SATA drive I had laying around. That worked just fine.

The Software

With the computer finally up and running, it was time to get some services installed. I got WordPress installed first, and it was running fine when it was being accessed via port forwarding on my router. I realized I was going to need a reverse proxy to handle access to multiple services on a single domain name. pfSense has HAProxy available in its repositories, so I decided to go with that. It’s a little convoluted to set up if you have no experience with reverse proxies, but after watching a couple videos and reading a few articles, I got it going. There was one problem though; no formatting (CSS and the like) was being applied to web pages accessed through the reverse proxy.

I found a few solutions on the web, but I couldn’t figure out how to implement them. They all involved changing the HAProxy configuration, which wasn’t a problem. It seems like most people run these reverse proxies on a separate virtual machine, not on pfSense, so their configuration was done in a text file rather than a web interface. Forum posters were being told to add a couple lines of code to the config files, but I wasn’t able to do that on pfSense. I decided to come back to that later.

After adjusting some HAProxy settings to try to get a reverse proxy going for my local services, I accidentally locked myself out of the pfSense web interface. No problem, I thought, I’ll just roll back to the most recent snapshot. So I did, and I was back in. That also wiped out the new SSL certificate I made earlier in the day. Again, not a problem I thought, I’ll just issue it again. Turns out I had already issued all the duplicate certificates I was allowed for the week, and I couldn’t get a new one until the next week (today).

In the Meantime

While I was waiting for the timer to run out on the certificate, I decided to press on with some other services. I set up a wiki to keep track of my network and installation notes for things. I decided to would be fun to try out an RSS reader, so I got Tiny Tiny RSS going.

A big part of setting up this server was for media serving with Plex, or something like it. I looked into the options, and it seems the three most popular, in descending order, are Plex, Emby and Jellyfin. I was originally planning on Plex, because it has the best name recognition and I knew it could do what I wanted. I tried out Emby before, and I was considering it this time. I hadn’t heard of Jellyfin before, but people seemed to like it. I axed Plex because while most commenters said it did a great job of serving up media, many useful functions are locked behind a not-inexpensive premium tier. The same is true of Emby, and Emby has an additional demerit with its licensing. Basically, Emby used to be open source, and the developers suddenly decided to go closed source. I don’t necessarily have a problem with closed-source software, but going from open to closed, and so abruptly is a problem to me. Jellyfin picked up the pieces and is based on the last open-source Emby code available. It’s not totally 100% quite yet, but it does everything I need.

From the start, this media server was supposed to take over the live TV services from the living room computer. Things were looking promising at first. Jellyfin supports live TV, and using NextPVR as a backend, so I was all set with my stupid Ceton tuner. I put the tuner in (with no drama like the HP server had) and set up PCI passthrough to a Windows VM for NPVR. I connected Jellyfin to that and things were working perfectly, with absolutely no fuss. I seemed too good to be true. And it was.

While the tuner worked perfectly (better than the bare-metal installation on the living room computer) with the Windows VM turned on, things went south when I shut the VM off. Shutting the VM down crashed the whole server. It was an abrupt shutdown, like yanking the power cord. That wouldn’t work. If it was a graceful shutdown, like clicking the button in Proxmox, maybe I could have dealt with it. Maybe not with the frequency with which Windows needs to reboot for updates.

The only solution to letting the new server handle the TV services was to get a new tuner. Pickin’s are pretty slim when it comes to cable card tuners these days. You can either have an old (used) HD Homerun, but they’re really expensive and only have three tuners, or you can have a stupid Ceton which has more tuners, but has very little software support (probably because the company doesn’t exist anymore). I picked a Ceton InfiniTV 6 Eth. This is an ethernet tuner similar in style to an HD Homerun, except worse. It’s gotten a tad less painful to go with a Ceton tuner in the past year because one enterprising person in the NPVR community has authored a piece of software called cetonproxy. This makes a Ceton tuner appear to be an HD Homerun device. That means I can either use NPVR 5.0 to handle tuning, or let Jellyfin do it directly. I’m not sure which way I’m going to go, but the tuner should be in tomorrow I hope, so I’ll post an update soon.

Today

I was finally able to issue a new SSL certificate today. I got HAProxy set up after reviewing a few tutorials and I figured out what I needed to do to make WordPress and my other services work though the reverse proxy. Some services need this code added to the “Backend pass thru” section of their backend configuration:

http-response set-header Content-Security-Policy upgrade-insecure-requests

Some need this added to the same section:

http-request set-header X-Forwarded-Port %[dst_port]
    http-request add-header X-Forwarded-Proto https if { ssl_fc }

I don’t know why some need one or the other, but it works, so ¯\_(ツ)_/¯. I’ll have to read about it some time.

WordPress would load up mostly fine with the the first option, but some sections of the site, like the live appearance customizer wouldn’t load, and Firefox would tell me passwords may not be secure. This said to me that there was mixed http and https content being served up. This happens because WordPress doesn’t know it’s behind a reverse proxy that is handling SSL. All I had to do was add this code to the top of my wp-config.php file:

/** Make sure WordPress understands it's behind an SSL terminator */
define('FORCE_SSL_ADMIN', true);
define('FORCE_SSL_LOGIN', true);
if ($_SERVER['HTTP_X_FORWARDED_PROTO'] == 'https')
$_SERVER['HTTPS']='on'; 

Next

Coming up this week, I need to get the TV tuner set up and get a torrent client going with Jackett, Radarr and Sonarr. The weather is going to be very hot and sometimes rainy after tomorrow, so it should be a great time to stay inside at the computer. I’m so happy to have the blog back after a month away. I really missed it.

Taking a New Direction with the Server

As I said a couple weeks ago, I got my DL380 server going. At least for a little while anyways. I started testing some services on it like WordPress and Grocy (the latter of which will be a post of its own in a couple weeks). I was satisfied with the web services, so I decided to try getting my stupid Ceton TV tuner card set up in the server. I got Proxmox ready to do a PCI passthrough of the card to a Windows 10 VM and then installed the card. To do so, I had to detach the SAS cables from the RAID card. Unfortunately, the server won’t boot up correctly with the tuner card installed. So I took the tuner out, which means I detach and reattach the SAS cables again. I made sure to connect them to the same ports as before. But, to my annoyance, when I started the server, it couldn’t boot from the hard drives anymore. I don’t know if disconnecting the cables ruined my arrays, or maybe I mistakenly connected the cables to the wrong ports on the RAID card, or what. This enterprise server seems so touchy. I guess part of that might be because I’m not really using it as it was intended. Anyways, I’m going to cut my losses and use some of the parts to put together my own “white label” server.

I should have built my own to begin with, but I couldn’t find any parts that could beat the price to performance ratio of the DL380 on paper. I think part of the reason for the DL380’s excellent price/performance is the relatively unloved socket LGA 1356 for the processors. LGA 2011 is from about the same era, but was used in a lot of servers and desktops. The processors and motherboards, even many years later, are decent amount more expensive than similar LGA 1356 parts. At the beginning of this, I was unaware of the relative rarity of 1356 parts.

I found a dual-socket Intel motherboard that should do the trick. I’m teaming that with a Dell H310 RAID card that I’ll be flashing for use in IT mode so I can use ZFS and an HP NC365T NIC. This motherboard has enough slots to accept my TV tuner card, so hopefully it’ll boot with it installed. There’s also a PCIe x16 slot, so if I’m really lucky I might be able to put my RX 480 GPU in there too. The motherboard is a CEB size, which the internet tells me is between a regular ATX and E-ATX in size, and uses the same IO shield size and screw holes as ATX. I picked an Antec P101 case to hold everything. It says it should hold an E-ATX board and eight 3.5″ hard drives. Plus, it has a 5.25″ drive space on the outside, so I can move my Blu-Ray drive from my desktop over there and set up an automatic ripper.

Right now the only part I don’t have on order is a power supply. I want something that’s at least 750 watts, and I’d probably go up to 1000 watts. I definitely want something 80+ Gold efficiency at the least, and I have to have two CPU power connectors for the dual socket board. This narrows down my selection, but not severely so. Both EVGA power supplies I have in my house right now meet those criteria. Unfortunately, it appears coronavirus has totally wrecked the supply of power supplies. Hardly anything is available, let alone decent power supplies, and what is available is two to three times more expensive than usual. I’m going to keep my eyes peeled for reasonably priced used ones, but I may have to wait a while before I get this server going. I’ll update when I get it built.

Fixing Internet Speed on Virtualized pfSense

It’s been a few weeks since I set up my pfSense router inside Proxmox inside a HP desktop computer. After I set it up, I noticed my internet speeds weren’t quite what I was getting with the Orbi acting as the router. With the Orbi, I generally got somewhere around 650-700 Mbps for downloads and 700-800 Mbps for uploads. With pfSense, I was getting around 520-550 Mbps for both. My internet service should be 1Gbps in both directions (actually a theoretical maximum of 940Mbps due to the way the network hardware works). I set up pfSense as the Great 2020 Work From Home was in full swing, so I thought maybe Verizon’s network had more concurrent users during the day slowing me down. I didn’t really think anything of it until today, when I was downloading a 100 GB game.

When I first setup pfSense, I told Proxmox to give it two NICs of the VirtIO paravirtualized type. When I get pfSense set up, I noticed it told me the speed of the two interfaces was 10 Gbps, and my web page loading times were very long. I assumed this was a duplex mismatch, and changed the NIC type to Intel E1000. Pages loaded just fine after that. It turns out it was a mistake to change the NIC type. VirtIO was the correct type, and the 10 Gbps speed was referring to the link to the Proxmox virtual switch, not the link to the internet or my physical Cisco switch. I changed back to VirtIO and disabled all hardware offloading in the System > Advanced > Networking settings of pfSense.

I also happened upon a Reddit post describing the same issue I had. I followed the directions to install ethtool and add one line like

post-up ethtool -K vmbr0 tx off

for each virtual and physical interface in /etc/network/interfaces.

I also discovered that while pfSense CPU usage was only in the single digits when doing web browsing, during speed tests and large downloads, it hit close to 100%. I resolved that by adding another CPU core in the Proxmox hardware configuration. CPU usage is now 70-80% during big downloads.

I fixed everything up with these changes. My downloads and uploads now easily hit their maximum possible speeds of 940 Mbps, at least when other internet usage is kept to a minimum. I wish I did this last year when we first got Fios because I never got the advertised gigabit speeds with the Orbi router. I guess the Orbi wasn’t designed to handle a gigabit WAN connection. pfSense handles it with no trouble, at least once it’s properly configured.

The Server is Running

Long story short, I couldn’t figure out how to get the DL380e going again. I decided it was best to just get another because it was so cheap. The new one came in over the weekend and other than some damage to the hard drive cage, it’s working perfectly. I switched the damaged cage out for the good one on the broken server. Set up was fairly easy. I used the HP SmartArray tool to set up two arrays; one single SATA drive for the hypervisor, then six 3TB SAS drives in RAID 6 for my VMs. That gives me 12TB of storage. I got some virtual machines running today, and they’re working great.

One thing I’m not too thrilled about is the power usage. With a couple VMs going iLO reports power usage at around 165 watts. I was hoping for more like 100 or 120 watts. It’s hard to justify that kind of power usage. On the other hand, it’s hard to beat the performance per dollar of a used server. The server itself, processors and memory were around $250, for a machine with 16 cores, 32 threads and 46 GB of memory. I could get something that uses less power, but it would cost more for less performance. My ideal machine would probably be a 16-core Threadripper, but processor and motherboard separately cost more than my whole server. Maybe I can get some used stuff in a few years when it’s time to retire the HP server.

Homelab Underway

There’s been a flurry of activity, and a false start in the homelab in the last week. I made my shit-tier vertical mount rack system and put it in my office closet and got just about everything set up. On the other hand, I have some trouble with the HP server I bought.

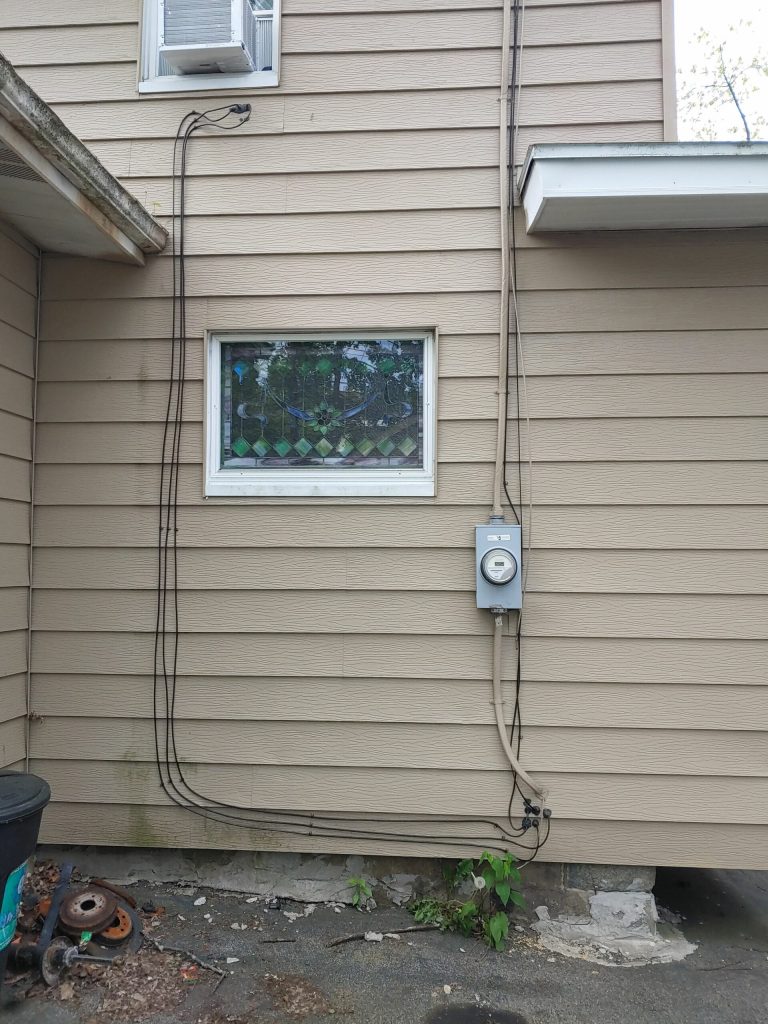
The first step to get everything working was to run some cables into the office; two ethernet cables and on RG6 coaxial. All three cables go from the basement to the office along the outside of the house. The coax and one ethernet cable are attached to the ONT (optical network terminal, basically a modem but for fiber optic) in the basement. This supplies the main internet connection to the office. The coax is disconnected for now, but I might hook it up and put my TV tuner in the office. The second ethernet cable ends up connected to the Orbi satellite in the living room for wired backhaul.

The new cables are on the left. I would have run them with the electrical service and fiber optic cables, but I don’t have a ladder tall enough. Just ignore all the garbage on the ground. It’s not a crack house, I promise.

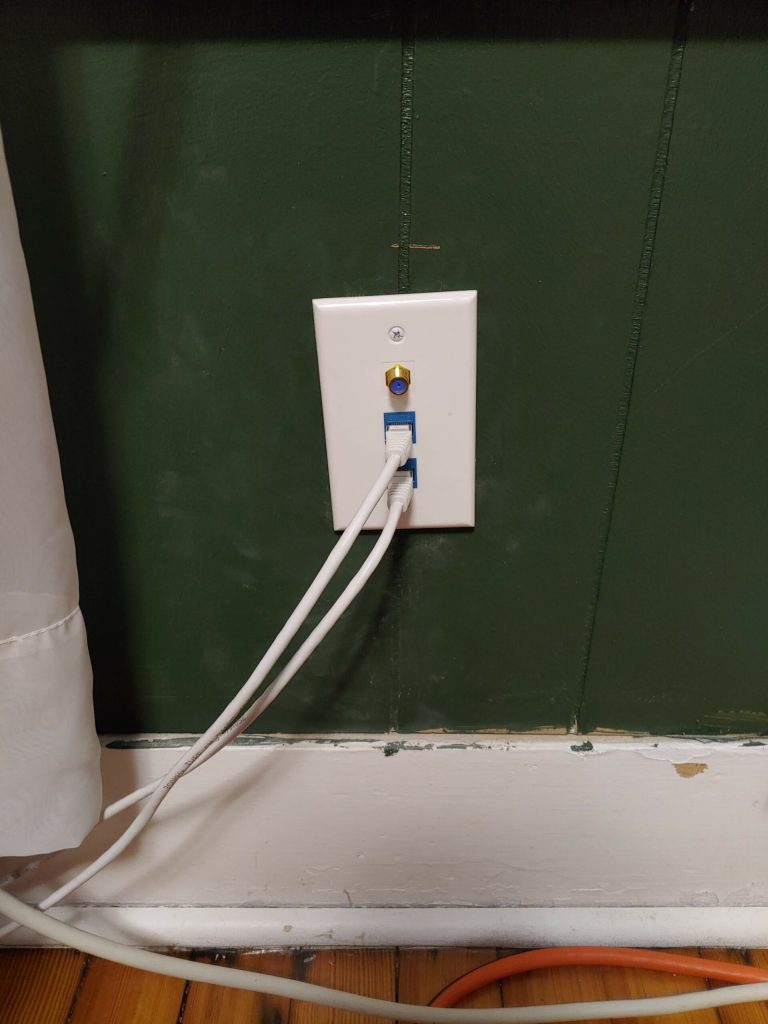
I added a wall plate under the office window to nicely terminate the wires coming in. I used a backless retrofit/old work box to hold everything in place.

Not quite straight, but it gets the job done.

The upper ethernet cable is the internet supply from the ONT, and it goes to the new pfSense router across the room.

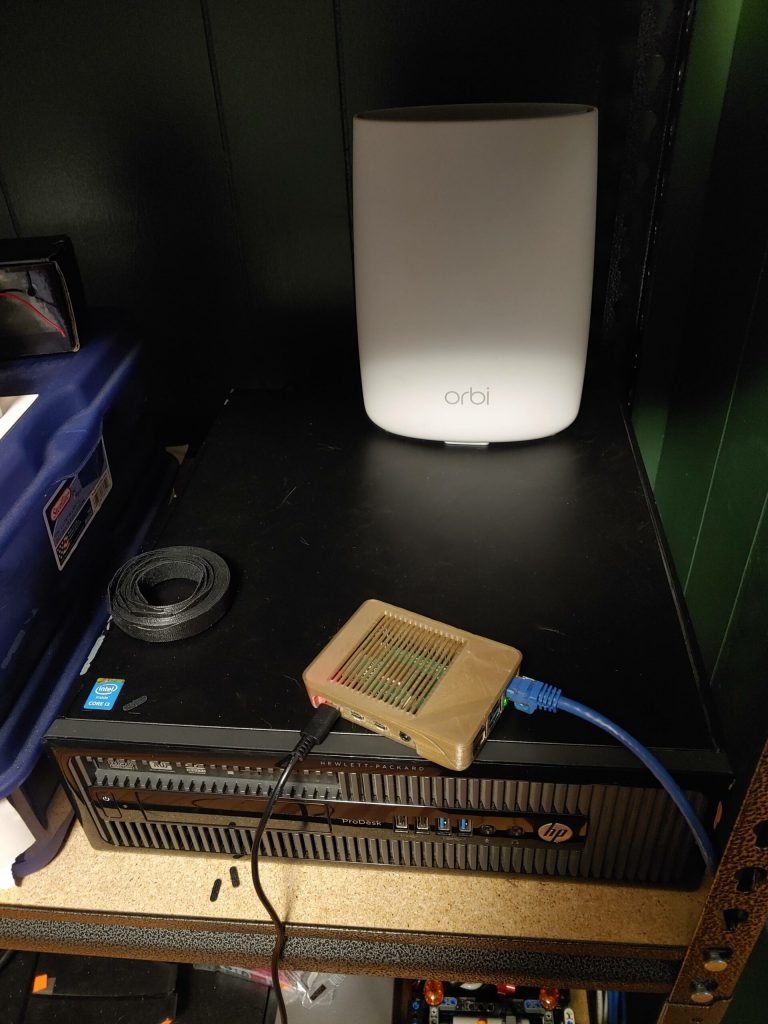
The HP desktop is the “router.” The Orbi is now acting just as a wifi access point. The gold thing is a Raspberry Pi 4 B 2GB which is currently serving up this website.

The HP ProDesk 400 G1 (what a name 🙄) desktop has an HP NC365T four-port NIC that handles the in and out for pfSense. Speaking of the software, I’m actually virtualizing pfSense. I’m using Proxmox as the hypervisor. Proxmox is a common choice for homelabbers, but it doesn’t seem to be as popular as ESXi. Most homelabbers use the same hardware and software as their work does, and almost no business uses Proxmox. I picked Proxmox because it’s free and open source with no limitations on its capabilities. ESXi places limitations on what you can do with the free version of the software, and I don’t want to pay the yearly subscription to use everything. On the other hand, I probably don’t need everything in the paid version. Anyways, it’s Proxmox for now. I set up pfSense as a virtual machine within Proxmox and assigned it two ports from the NC365T to do the routing.

I’m also running a Pi-Hole on the HP desktop inside a Ubuntu virtual machine. I was initially using Debian, but I ran into problems that I may have erroneously attributed to Debian. I still have trouble with the Chrome browser on my desktop while running on Ubuntu. Firefox on the same computer works perfectly. I never had any problems with any browser when running on a Raspberry Pi. Pi-Hole had a big 5.0 update a couple weeks ago, so I might have to try Debian again sometime over the summer. For now, it gets the job done; the ad blocking is working normally.

The LAN port on the router is connected to a Cisco 3560G switch. I just finished a semester-long networking class with curriculum provided by Cisco (I got an A, by the way), so it seemed like a good idea to get a switch I was already familiar with. The switch basically distributes the LAN (and thus internet) access wherever it’s needed. The Orbi base station is plugged into the switch, and the base station is then connected to the satellite in the living room. These provide the wifi coverage for the house.

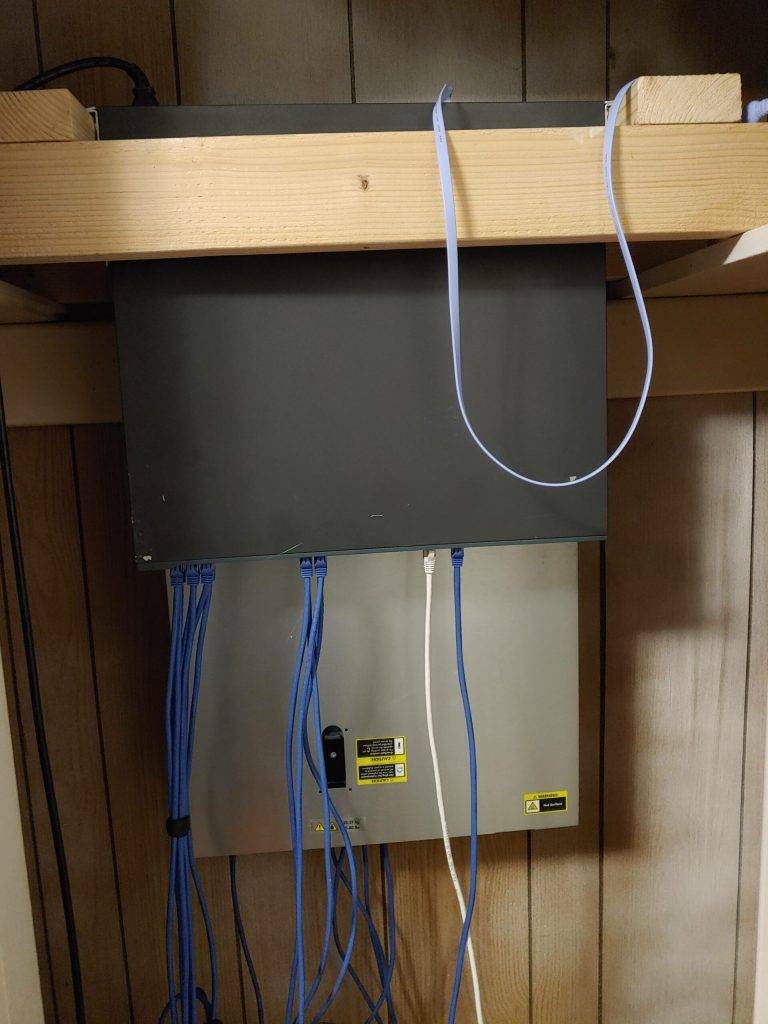
The shitty “rack” I put together in the closet. It works though, and the things are so much quieter in there than out in the open.
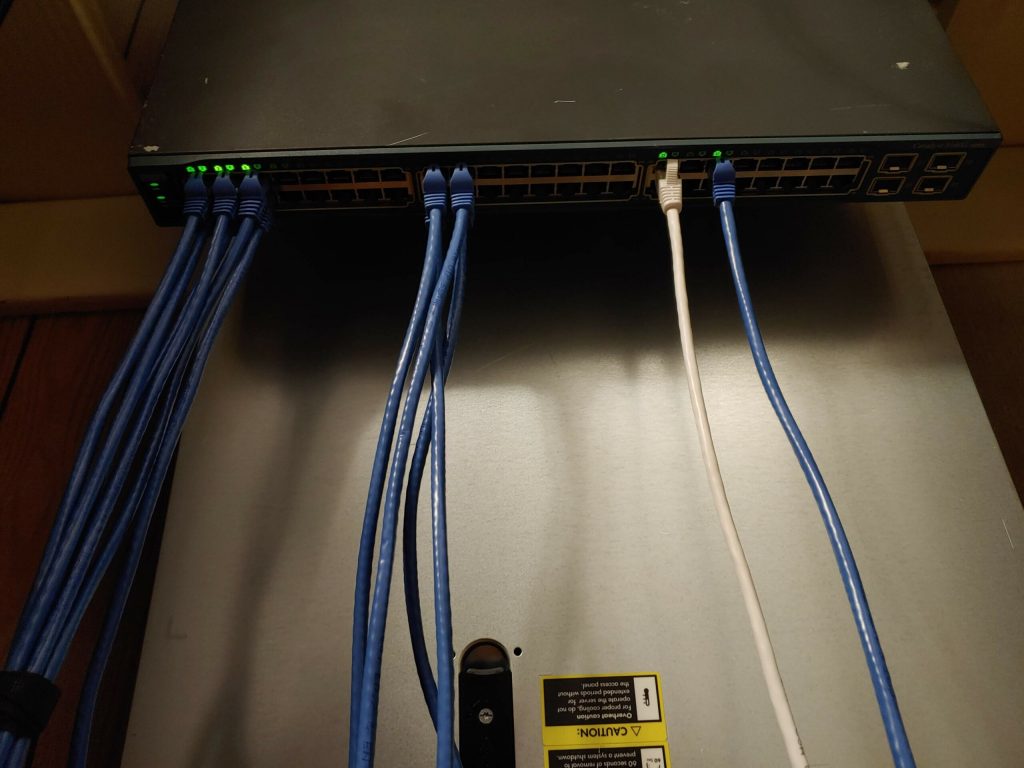
Pretty lights.

The network side of things is going great. The server on the other hand, is not. I installed the hard drives I ordered and put it in my rack, and now the RAID card doesn’t work. No matter what I do, I can’t get it to work. It gives me an error like the card itself is defective or not plugged in properly. I initially thought a dead battery for the card was causing the problem, so I bought a new card and battery, but got the same result. The only difference was adding the hard drives and moving the server. It worked perfectly fine two weeks ago on my shelf. The server was pretty cheap, so I ordered another identical one. Hopefully it doesn’t get killed. If you think you might be able to help me with my P420 controller woes, drop me a line here.

Overall, I’m happy with the set up so far. The only thing I’m a tad dissatisfied with is the wifi solution. The Orbi is a great mesh system for the consumer, but I find it a little lacking from my more somewhat more knowledgeable perspective. The big thing that’s missing from it is support for virtual LANs. I’d like to have three wifi networks: one for guests, one for things, like printers and smart speakers and the thermostat, and one for trusted devices like personal laptops and phones. VLANs would make this possible by allowing the three wifi networks to be on separate VLANs with separate routing and firewall rules to keep traffic out of the home network if needed. Commercial wifi gear like Ubiquiti is all about that stuff, and if I hadn’t purchased the Orbi stuff relatively recently, I’d probably look into some of those commercial access points. Maybe I’ll cruise around for some used ones on eBay some time.

Home Lab Update

I’ve acquired a everything I need to start my set up and I’ve been playing with it for about a week now.

The HP server is great so far, except for the noise. I know enterprise servers are probably designed with no thought given to noise levels, but Jesus, this thing is ridiculous. During the entire minute-plus POST process, the six fans run at their maximum speed of something like 12,000 rpm. It’s loud. If I was near a rack full of them all day, I’d definitely be wearing some ear protection. Once the fans settle down to 35-40% when the thing is idling, they’re bearable, but still too loud to have on an open shelf in the office. I’ve decided to make a redneck “rack” to suspend the server and the switch vertically in the office closet. I’ll be making it this week, so I’ll be sure to post some pictures. In other news, the server turned out to take 3.5″ drives, not 2.5″, which really pleases me. I found some used 3TB HGST SAS drives and got six of them, plus some drive trays. I’ll be doing a RAID 6 array, so I should have 12TB of total storage while being able to recover from two drives failing simultaneously.

I got a Cisco 3560G 48-port switch to connect everything. I decided I had to update it, and killed it somehow. The flash memory appears to be wrecked. I used the web admin page to try to update it, and that image might have been too large for the flash memory. I tried to format the memory and install a new OS over the serial connection, but I had no success. So I bought another switch. The same model, but this one has already been updated to the latest supported version of IOS and it has a one year warranty. I won’t even be thinking about updating this one.

The SFF HP desktop as a router is coming along just fine. I dug up an old hard drive from a MacBook Pro I flipped a few years ago to use as the storage for that. At 250GB, it should be more than plenty. The system came with only 4GB of RAM, so I ordered another 4GB stick that should be in this week. I could probably get by on 4GB, but why not double it for like $12? I installed an HP NC365T NIC to give that computer a total of five gigabit ethernet ports. I’ll be using the built in port for the Proxmox admin console, then three of the four ports on the HP card for pfSense and Pi-Hole. I also need to get a VPN running, and I’d like to use WireGuard, which I may be able to do right in pfSense. If not, I’ll get a third VM going on this router box to handle VPN duties and use up the last ethernet port.

I’ll be running some wires to get wired internet and cable TV from the basement to the second-floor office. It shouldn’t be too difficult, but I’ve never run wires on the outside of a house before. Theoretically, all I need to do is add a couple holes to the area where the electric service and cable/fiber connections enter the house from the outside, put the wires through there and then drill a couple holes in a wall of the office. I’m hoping to not have to terminate my own ethernet cables because it’s a real pain. Monoprice has some outdoor rated cables with RJ45 connectors already attached for a great price, so I’m going to try to drill a hole big enough to let the connector through. The coax cable for the TV signal is no problem though, I’ve used compression-fit connectors on those a million times.

I’ll be ordering all my cables early in the week, so hopefully I can get drilling on the weekend.

Starting the Home Lab

A little while ago, I stumbled upon the r/homelab subreddit. There, users gather to discuss their home network setups, often used for experimentation like a laboratory. I finally have enough money to get started on a modest set up, so I ordered some pieces this week to get started.

I’m currently taking classes to get a degree in computer networking. One class is an introduction to computing class that has us using virtual machines for something. Another is a networking class that should prepare me for the Cisco CCENT certification exam. I’ve become a lot more interested in the subjects thanks to the classes. At the same time, my home network needs have changed and I could use some more power and storage.

Enter the homelab. Following some guidance from the r/homelab wiki, I decided on a basic set up. For hardware, I decided to get an HP DL380e Gen8 server, a Cisco Catalyst 3560G 48-port switch, and an HP ProDesk desktop. The plan is to use a hypervisor (probably Proxmox) on the ProDesk so it can act as a pfSense router, Pi-Hole ad blocker, VPN (hopefully with WireGuard), and reverse proxy (probably Caddy) all at the same time. This router will be connected to the Cisco switch, where I may set up some virtual LANs. I’ll have to see how everything works together. I got the DL380e as a barebones thing, so the specs were up to me. I decided to go with dual Xeon E5-2450 processors, and I’ll be getting 48 GB of RAM (the maximum is 384 GB). These are both pretty cheap options. I think I found a good deal on some 1TB 2.5″ SAS hard drives, so I will probably start with six of them in a RAID 6 configuration and add more as needed. I’m not totally certain about this though. The server will be home to a few virtual machines. I’ll be moving my TV tuner card there, so there will be at least one Windows 10 VM. I’m also going to be running my normal website from there, and I’ll probably run an OctoPrint setup so I can control my 3D printer, so I’ll need at least two Linux VMs for that. I’ll probably also throw in one for Arch Linux, just because I like to tinker with it. Beyond that, I’m not sure what else I’m going to do with it yet. Maybe host some game servers for Minecraft or something or get a media library going. I’d really, really love to put my spare RX 480 graphics card in it and stream some games. This is totally possible, but I need a very specific PCI riser card to fit a double slot graphics card, plus a power wire adapter and maybe an extra power supply. We’ll see how it goes and maybe I’ll try to track down the special riser in the future.

There’s no real purpose to doing this other than I want to. The experience with Cisco networking and virtual machines might help me get a job some time in the future. It’s not super expensive at least, and it’ll be fun to have a ton of computer power at my disposal.

Right in the Pi-Hole!

A while back, several versions of this blog ago, I tried setting up a Pi-Hole (pihole from now on) internet ad eater. The pihole set up was easy, but I had a big problem with internet speed. For some reason I couldn’t quite pin down, the pihole slowed my internet to a crawl. After some research, I think it had something to do with IPv6 traffic and pihole not being able to do anything with it. I could never find a solution to the problem.

Thanks to all this virus stuff, I’ve been doing classes online and slowed down my business, so I have a lot more time at home. I decided to give the pihole another shot today after class. It went almost perfectly this time.

I decided to use a Raspberry Pi Zero W for this project, but I may move it over to something with a wired network connection at some point. It took a little while to get everything installed and configured, but it was worth it. There are no ads anywhere; not on my phone or Pandora or streaming apps like Hulu. It didn’t slow the network to a crawl this time. In fact, it feels a bit faster than before.

The only problem I encountered had a relatively easy solution. My initial setup, with my router working as the DHCP server and the pihole as DNS only, wouldn’t allow me to reach my own domain name, raucousatthecaucus.net. I had to disable DHCP on the router and let the pihole take care of it. I’d rather have the router do DHCP, but this gets the job done.

I’m really pleased with the results. My local news websites no longer vomit ads all over me. I’ll have to print a case for the Pi when my new 3D printer comes in (hopefully in 10 days or so).

Another Update on My NextPVR System

Way back in April of last year, I told you about getting Verizon FiOS and setting up a NextPVR server and a Kodi client on a Raspberry Pi. I never did get that timeshifting problem fixed. It works when using NextPVR on the server, but crashes on the Raspberry Pi Kodi client. I think it has to do with the TV tuner I’m using. It’s a Ceton InfiniTV 4 PCI. It’s an old tuner that uses some proprietary system to interact with recording software. Because of that, it’s only compatible with Windows Media Center (RIP 😥) and NextPVR. I’d really prefer to use an HD Homerun device with a Linux based server, but they aren’t selling any cable card tuners right now. Anyways, I think that Ceton driver junk is hampering the timeshifting.

Since I’ve been back at school, I’ve been noticing the enormous number of Lenovo business computers around campus. A light bulb lit up in my head the other day. Why not replace the Raspberry Pi with a tiny Lenovo running Windows? So I did. I bought a decommissioned M72e Tiny from eBay for about $20. It’s a tiny computer, as the name implies. It’s about the size of a typical hardcover book. The listing said it worked before it was pulled from service, but functionality wasn’t guaranteed. Turns out it works perfectly.

For my $22.50, I think I got a pretty good computer. It’s got a Core i3 3220T it’s a dual core with hyperthreading running at 2.8GHz. I added 8 GB of memory I had laying around and an older 120 GB SSD. I also applied some new thermal paste to the CPU cooler for good measure. I’m really impressed with the performance. Even though it’s nine-years-old, it boots up in seconds. If I didn’t need a more powerful computer for gaming, I’d be very happy to use it as my normal desktop computer. It has one small fan, versus the Raspberry Pi’s fanless design, so it’s a tad louder than I’d like. I’m going to see if switching some BIOS settings helps that.

As for software, I installed Windows 10 and Kodi. Timeshifting works perfectly, so I’d call this mission accomplished. I ordered a used wifi card to add AC wifi and Bluetooth to the machine. I’ll install Steam so we can stream games from the living room or office into the bedroom and use a PS4 controller to play.

Update on NextPVR and Kodi

It’s been about two and a half weeks since I got Kodi set up on a Raspberry Pi in my bedroom to watch TV. So far, it’s going nicely. The guide works perfectly, setting and watching recordings is fine and watching live TV is great. However, I’m running into a problem with timeshifting on Kodi. When I pause a live program and then resume it a bit later, it works fine as long as I don’t fast forward or rewind. It’s a problem because timeshifting is kind of the whole point of this PVR system. I’m going to try adjusting some settings later today and see if I can fix the issue.